Put Your Coding Agents in Your Pocket
April 24, 2026
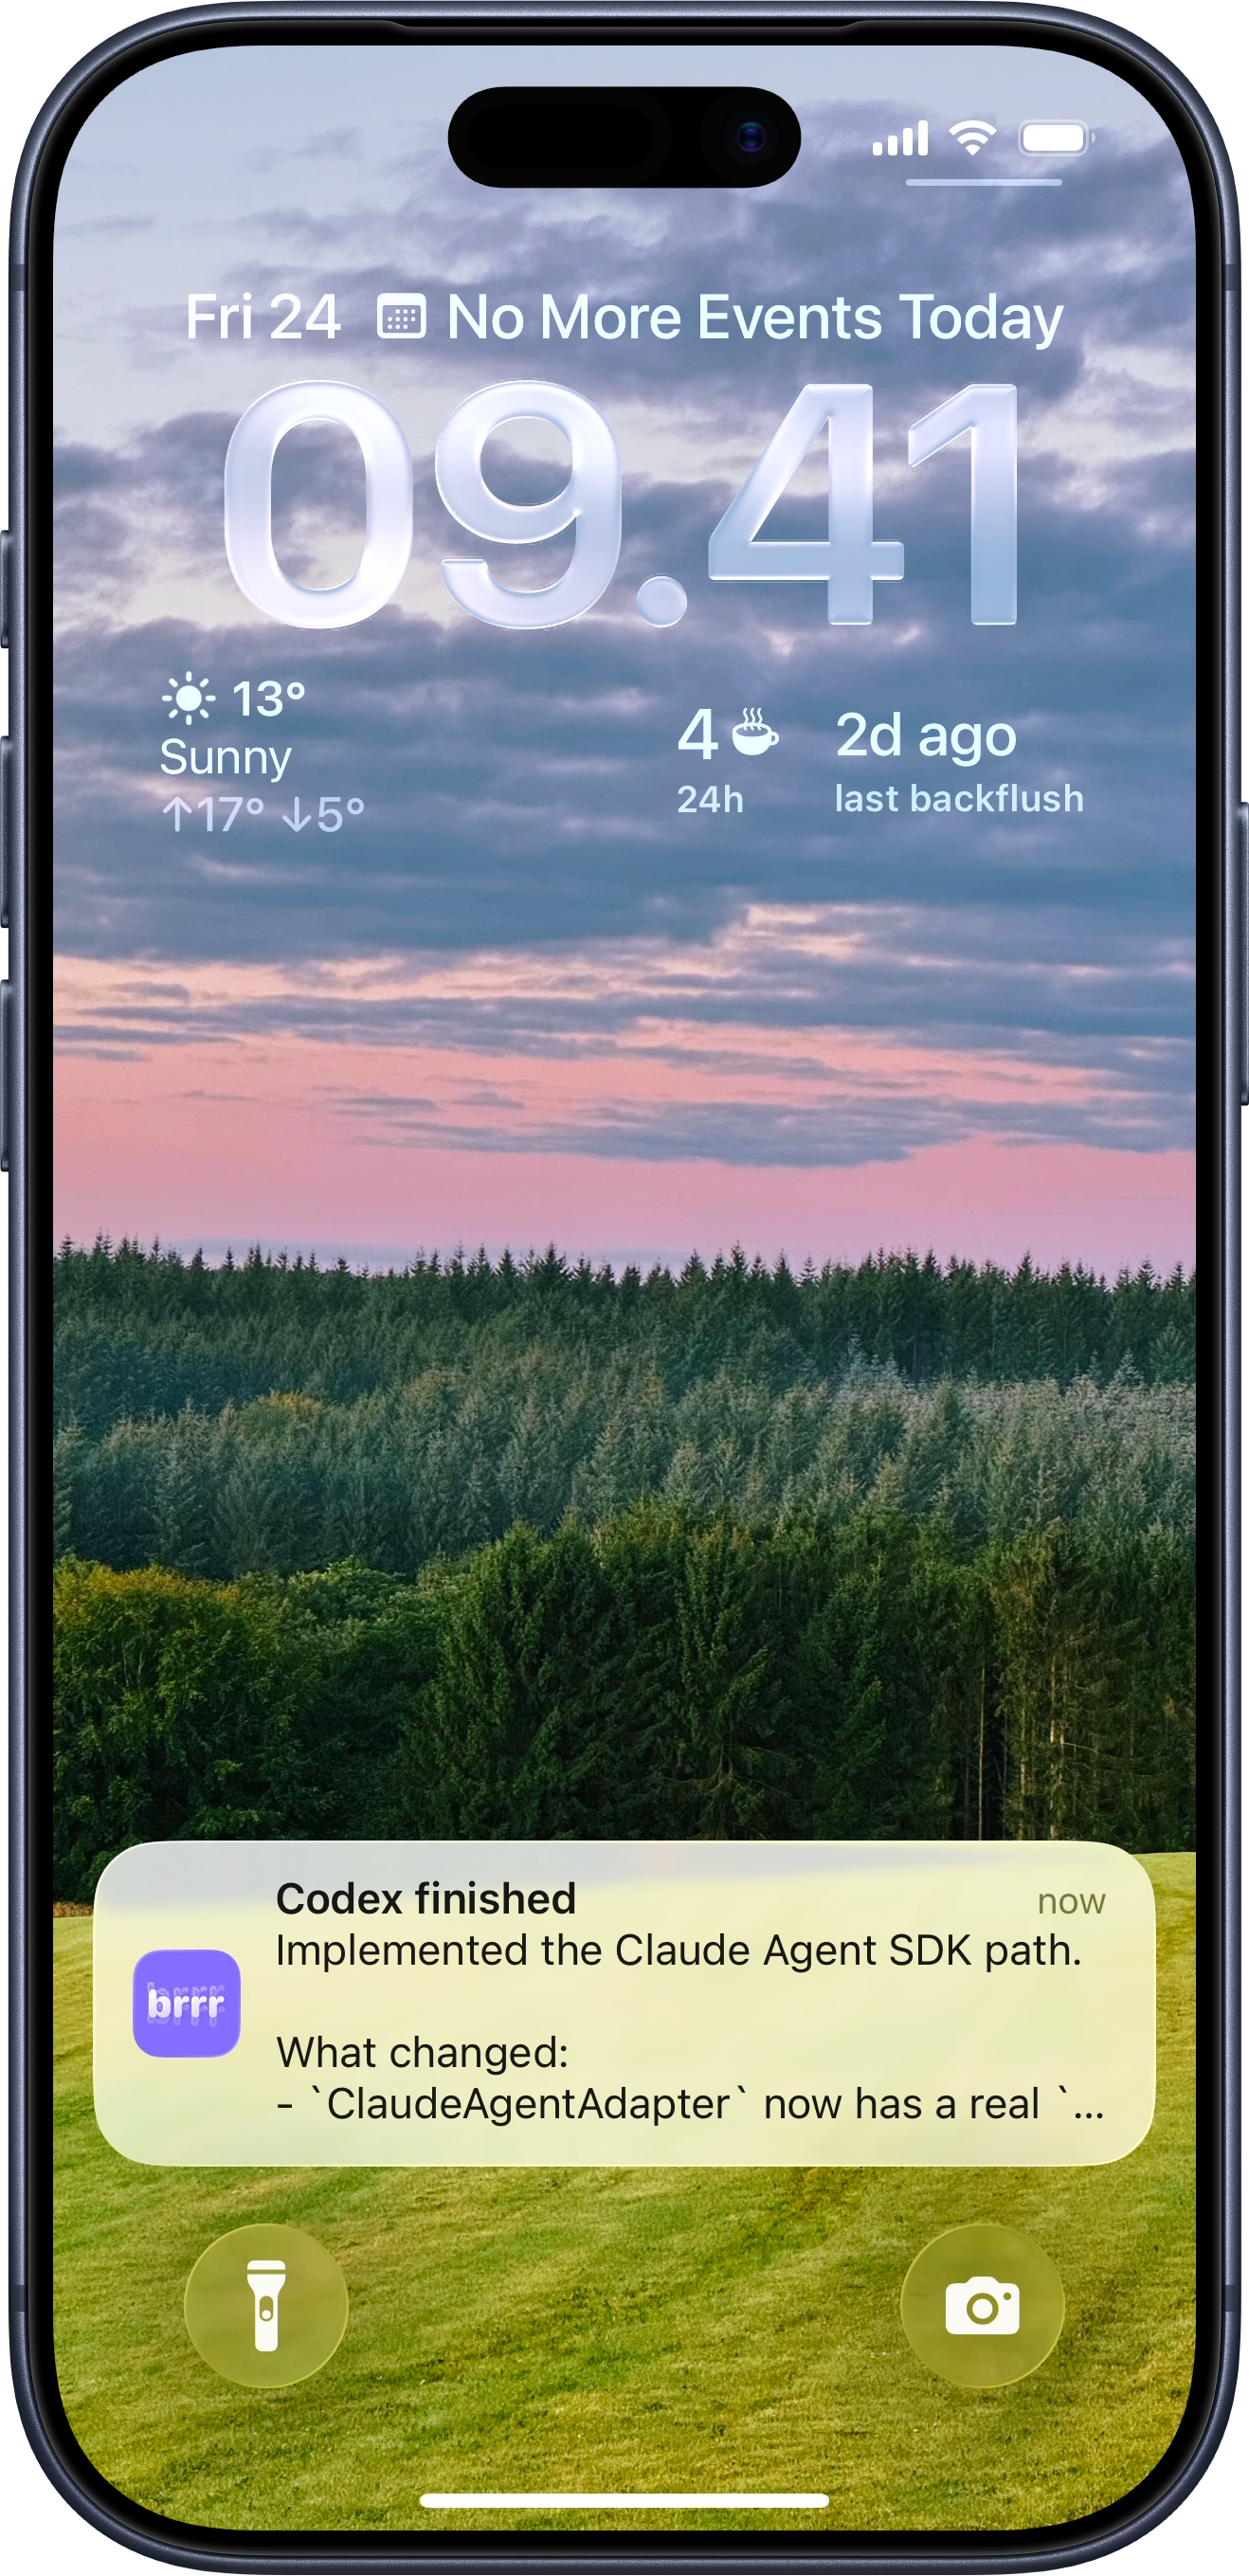
Sometimes Claude needs a reply while I'm brewing coffee. Sometimes Codex finishes a task while I'm away from my desk. And sometimes I need to use agents from the bathroom because my best ideas rarely show up at dignified moments.
This post outlines the setup I've been using for the past couple of weeks to access agents running on my Mac from anywhere, and it feels like having a fleet of agents in my pocket. It's not fancy, but it has worked really well for me.
There are other ways to do this now. Anthropic has Claude Code Cowork Dispatch. GitHub has remote access for Copilot CLI. And I even hacked on my own version for Codex in a project I titled "Codex from the shitter".
I eventually found that I wanted one setup that works with any agent. I also want the raw CLI experience, so I'm not limited by a product-specific UI that doesn't expose all capabilities.
My setup for accessing terminal-based agents like Codex, Claude Code, and whatever else I happen to be running on my Mac from my iPhone boils down to four things:
- Tailscale makes my Mac reachable without exposing SSH to the public internet or messing around with port forwarding.
- tmux keeps my agent sessions alive and resumable, even when my phone disconnects.
- Prompt gives me a genuinely nice SSH client on iPhone, with saved connections and a keyboard that can be tuned for tmux.
- brrr sends push notifications when an agent finishes, gets stuck, or needs input.
With this in place, the workflow is simple. I start agents on my Mac in tmux, walk away from my desk, get a notification from brrr when something happens, and jump back into the same session from my iPhone through Prompt and Tailscale.
That means I can check in, answer questions, approve things, or start new work from my phone.
Here's how to put it together.
1. Enable Remote Login on your Mac
Before your phone can SSH into your Mac, your Mac needs to accept SSH connections.
Open System Settings, go to General, then Sharing, and turn on Remote Login. I also recommend limiting access to your own user account instead of allowing every user on the machine.
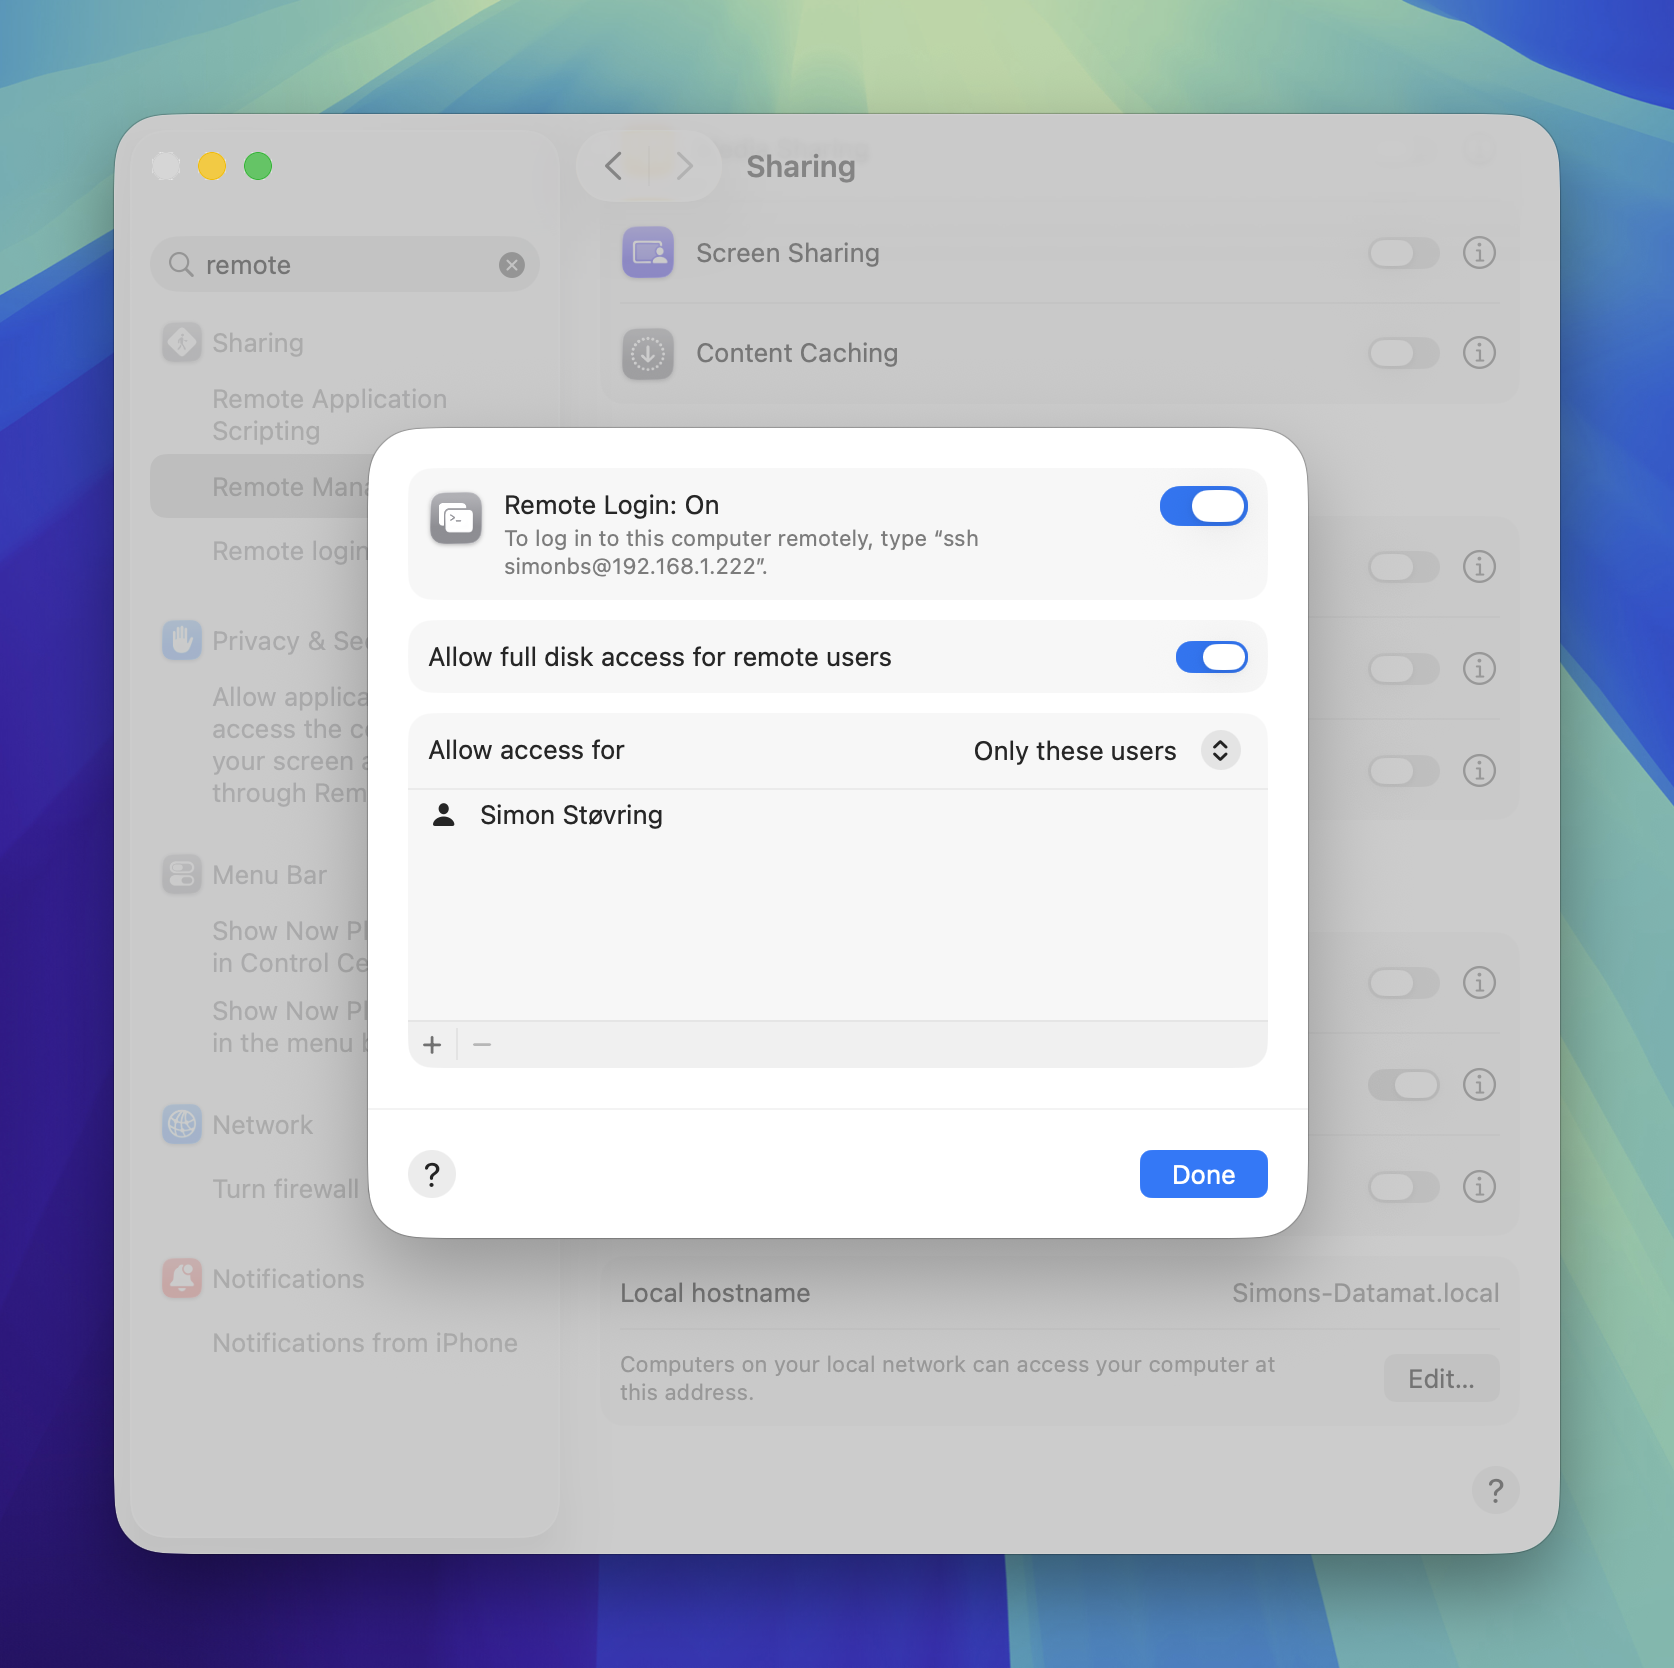
Once Remote Login is enabled, macOS will show an SSH command you can use to connect from another device. The local network address is useful at home, but the Tailscale address is what makes this work from anywhere.
2. Set up Tailscale on your Mac and iPhone
First, install Tailscale on both devices and sign in with the same account so they join the same tailnet.
This is what makes your Mac reachable from your iPhone even when you're nowhere near the same network. Once both devices are connected, your Mac gets a stable Tailscale IP address you can use to SSH into the machine. You can find the IP address in Tailscale's menu bar app on the Mac.
The rough flow is:
- Install Tailscale on your Mac.
- Install Tailscale on your iPhone.
- Sign in on both devices.

I like this because it keeps remote access boring. There's no router config. It's just an app running on both my Mac and iPhone.
3. Optional: Install Mosh for a better mobile connection
Update, April 25th, 2026: Several people pointed me toward Mosh after this post went up. Thank you for that. It fits this setup well, so I've added this as an extra optional step.
Mosh is a replacement for interactive SSH sessions that works better on flaky or changing networks. It uses SSH to log in, then keeps the terminal responsive as your connection changes.
Install it on your Mac with Homebrew:
brew install mosh
You don't need Mosh for this setup, but it's a nice upgrade if you spend a lot of time connecting from your phone on changing or unstable networks. If you want to use it, select Mosh as the connection type when setting up your connection on the iPhone later.
4. Install tmux so you can resume your work
Once you can SSH into your Mac, the next thing to tackle is session persistence. You want to be able to continue your work from any device, and tmux solves that. It's a terminal multiplexer, which means it lets your Mac and iPhone attach to the same terminal session.
You can start an agent at your desk, check in from your phone later, and continue from the same terminal state.
I run all my agents inside a single tmux session named agents, and I usually give each agent its own tmux window, so I can easily switch between different projects within the same tmux session.
You can install tmux with Homebrew:
brew install tmux
Then you can start a tmux session named agents using:
tmux new-session -A -s agents
If you're new to tmux, the tmux cheat sheet is worth keeping around while your fingers learn the shortcuts.
I've spent some time tweaking my tmux config so tmux is more tolerable by decluttering the status bar and adjusting colors to match my Dracula terminal theme.
Here are my most used keyboard shortcuts:
- Ctrl+A c: Create a new window. I'll typically start an agent in that window.
- Ctrl+A ,: Rename a window, so I can easily identify it. They're typically named after my projects.
- Ctrl+A [num]: Switch between windows.
- Ctrl+A &: Close current window.
Here's my .tmux.conf, in case you're looking for some inspiration.
5. Auto-attach to tmux when SSHing in
I've added the following few lines to my ~/.zshrc so that whenever I SSH into my Mac, it automatically starts or attaches to the agents tmux session.
# Automatically attach to agents tmux session when SSHing into the machine.
if [ -n "$SSH_CONNECTION" ] && [ -z "$TMUX" ]; then
  tmux new-session -A -s agents
fi
If you SSH into your Mac for other purposes, this might get in the way, but it's perfect for my extremely specific agenda: open phone, send a message to my agents, and move on with my life.
6. Pick a good SSH client for iPhone
Next, you need to pick an SSH client to use on your iPhone. I've used Termius and Secure ShellFish, and currently I'm using Prompt. It's fast, polished, and cheap.
Update, April 25th, 2026: After posting this piece, I've gotten a lot of useful feedback about other SSH clients. Thank you to everyone who wrote in and pointed me at alternatives. I'm now exploring other clients, and Echo and Moshi seem particularly interesting.
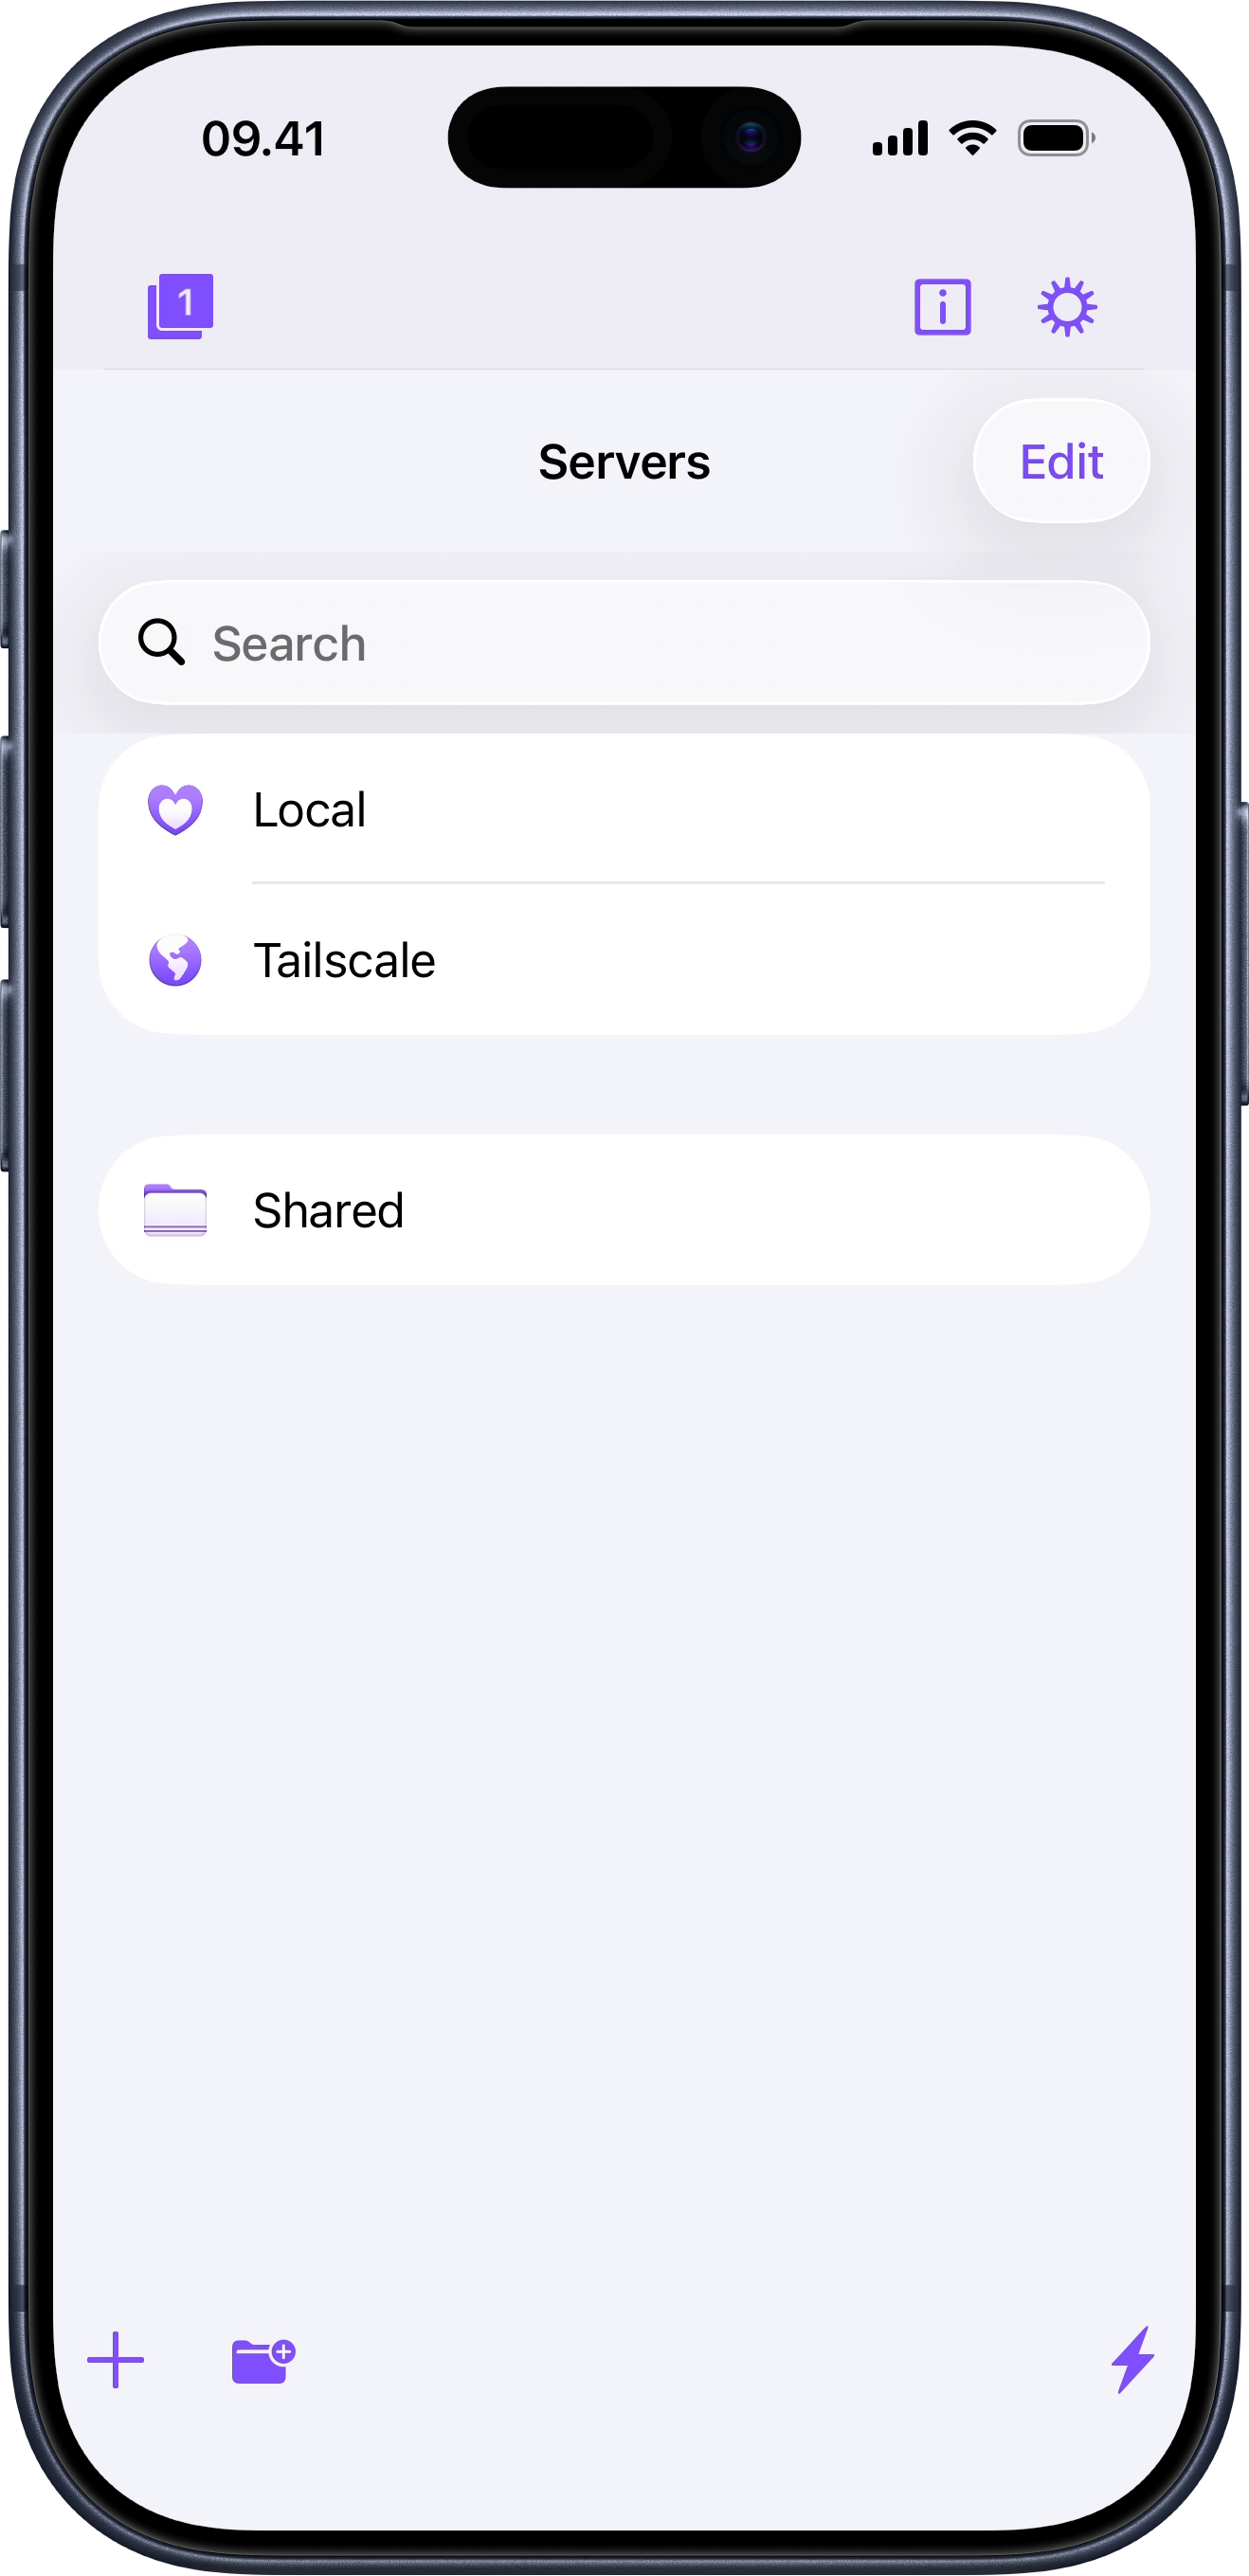
All of these SSH clients support saved connections, which makes this setup painless after the first round of setup. Create a server entry that points at your Mac's Tailscale IP address, log in with your username and SSH key, and you're in. If the client supports Mosh and you installed it earlier, choose Mosh as the connection type.
No matter which app you pick, it's worth spending a few minutes tuning the keyboard to your own habits.
For example, I've made sure my tmux prefix key (Ctrl-A) is easy to reach from the keyboard. I also have a button for inserting a line break in an agent prompt box with Shift + Return, plus a snippet that reattaches me to my agents tmux session if I ever detach from it.
This is where the whole setup starts to feel good. You tap a saved connection and land right back where your agents are already running.
7. Add brrr so your agents can poke you
This setup gets much better once your agents can interrupt you instead of making you check on them like a maniac.
brrr is a dead-simple push notification service with no sign-up needed. Download it to your iPhone.
We'll use the brrr-cli to configure Claude Code, Codex, and Copilot so they notify you when they finish, need permission, or need your input.
Install the CLI like this:
brew tap simonbs/brrr-cli https://github.com/simonbs/brrr-cli.git && brew install brrr
Copy your webhook URL from the brrr app and use the CLI to configure your agents like this, replacing the URL with the one you copied.
brrr agent install all --webhook 'https://api.brrr.now/v1/br_dev_...' --idle-seconds 20
I recommend setting --idle-seconds to something sensible so you don't get pinged while you're already sitting in front of the machine. I like to get pinged relatively fast, so I set it to 20 seconds.
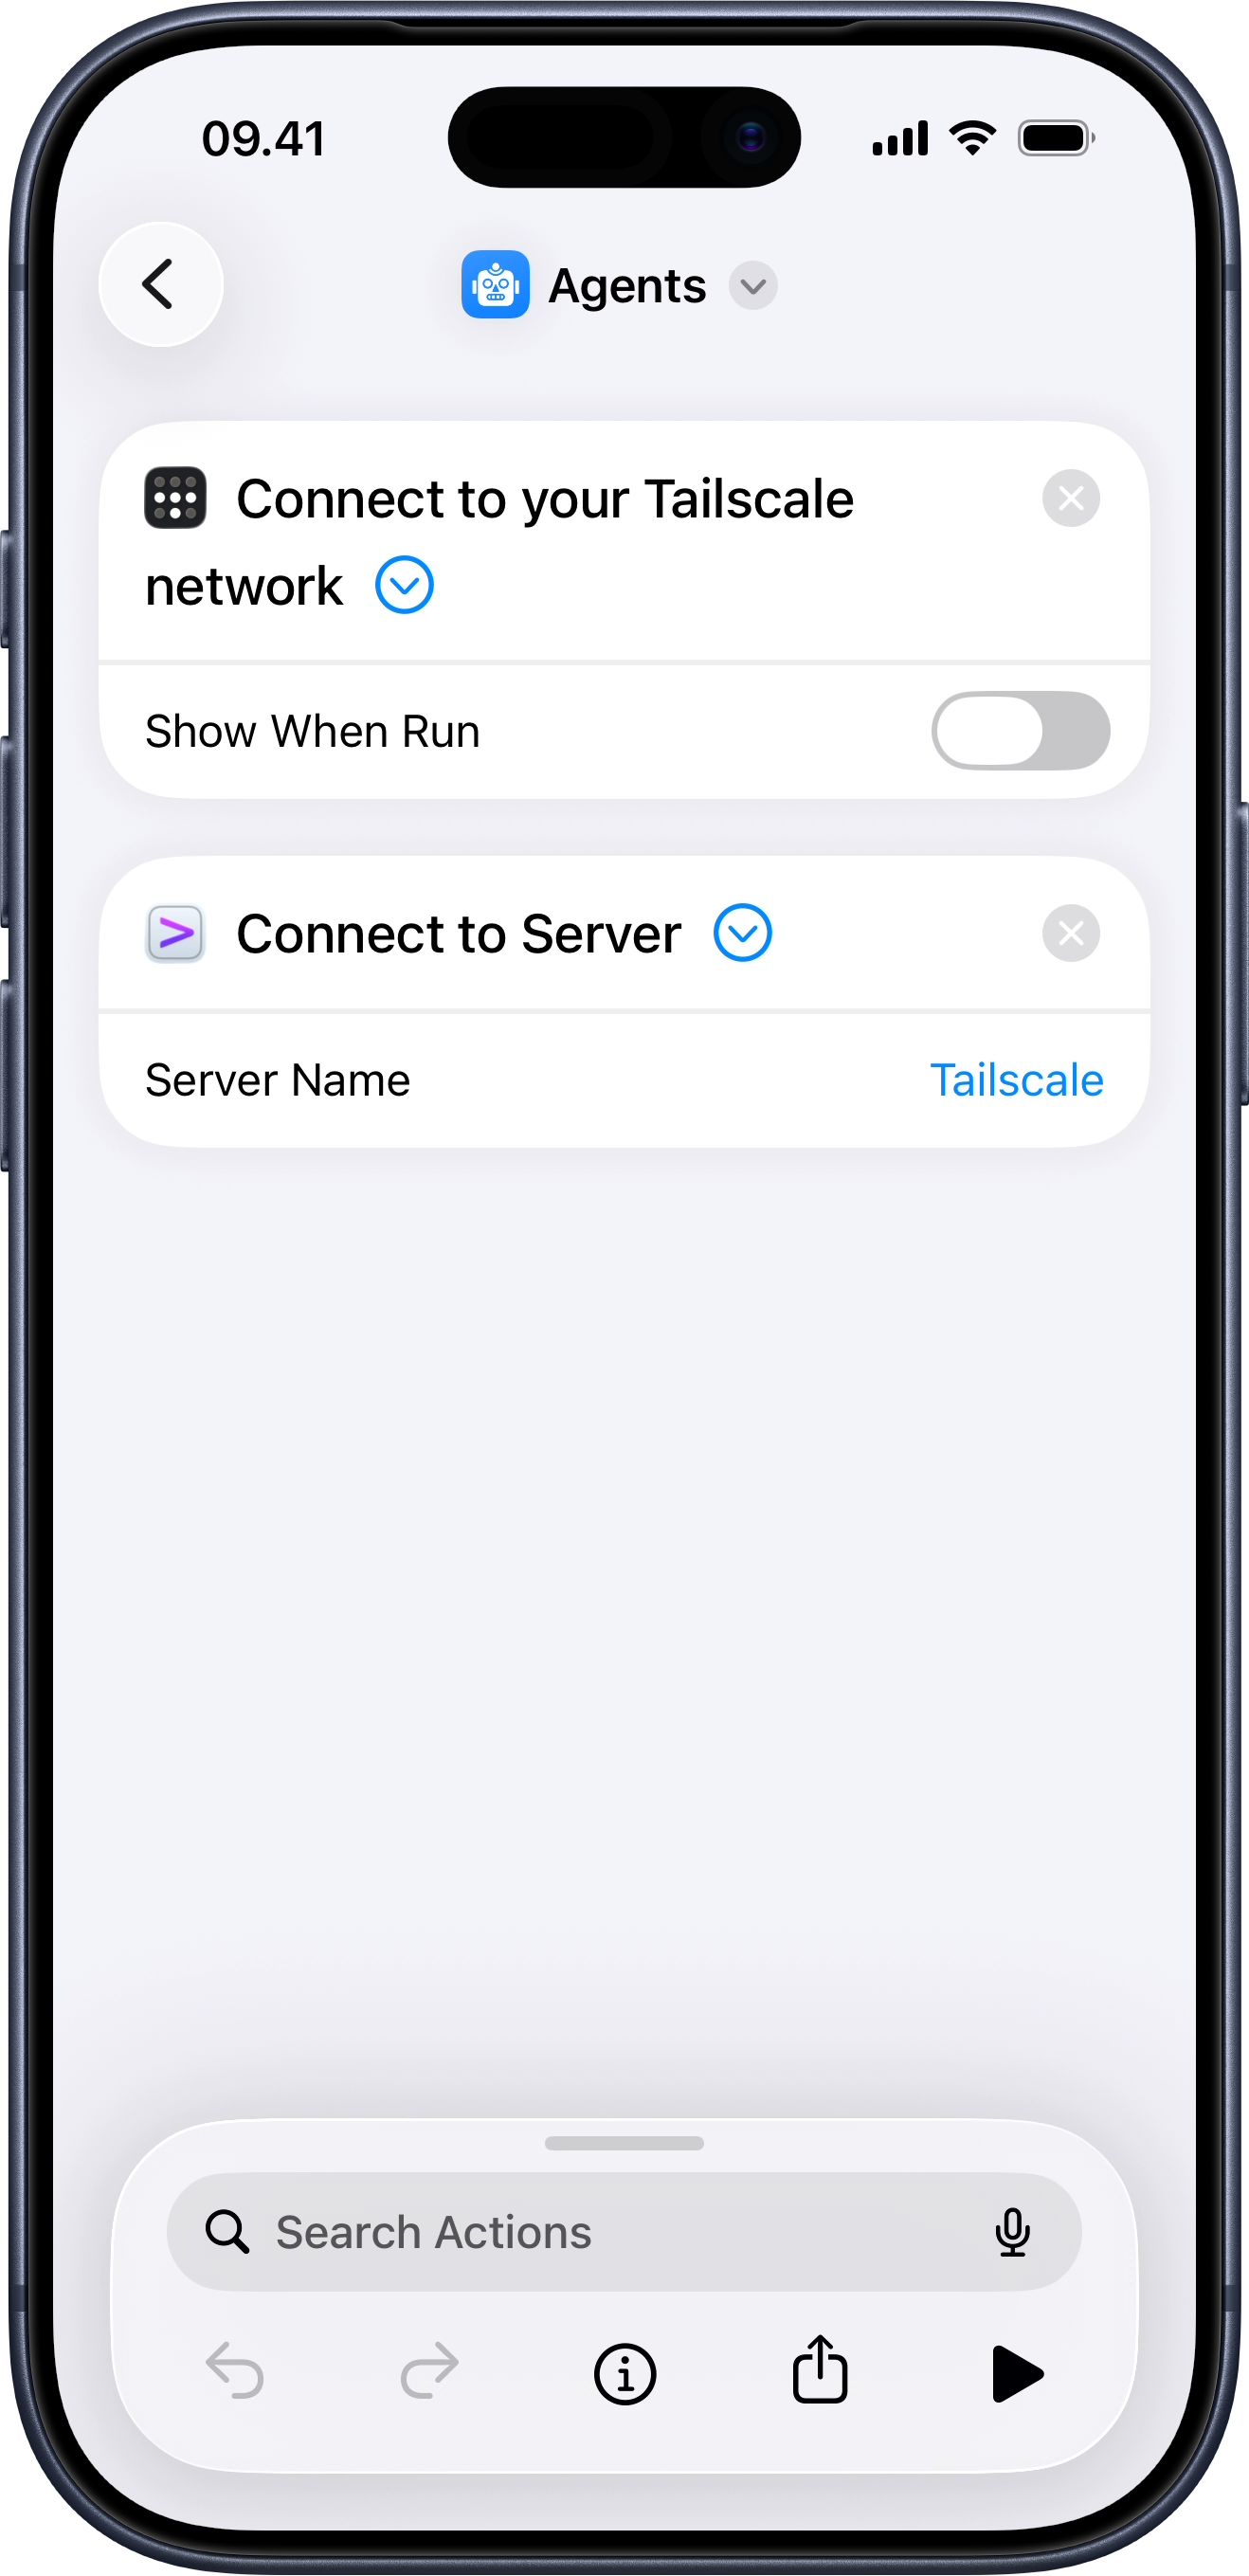
8. Add an iPhone Shortcut to start Tailscale and launch Prompt
This is an optional convenience step. I use a shortcut that connects to Tailscale and launches Prompt connected to my Mac. That way I can access my agents with a single tap.
Download my shortcut here. You could skip this, but I wouldn't. If you're going to do this often, shaving off a few steps matters.
That's the setup
There are a few pieces to it, but it sounds more convoluted than it is and each piece serves a clear responsibility. Tailscale gets me in, tmux keeps things alive, Prompt makes it usable from my phone, and brrr notifies me when the agent is done working.
With this set up, my agents are no longer trapped at my desk. Which is great, because my desk is not where all my best ideas happen.